Saturday, December 31, 2011

January Stamp of the Month BLOG HOP!

Welcome to our Stamp of the Month Blog Hop!

We will be featuring January's SOTM, which is called “Little Reminder”.  This set includes 25 stamps.

JanSOTM-Images

If you have come here from Vicki Price’s Blog, you are on the right path! The blog hop is a great big circle, so you can start here and work your way to see everyone’s creations.  If you get lost along the way, you’ll find the complete list of participating consultants here.

This month we have over 50 Close To My Heart Consultants sharing their creations using this month's SOTM!  This Hop is simple to do - just click on the link at the end of each post to move on to see the next consultant’s creation!

Ready for some FUN? J
Here we go!
Jan 2012 SOTM 3x3 holder typeset
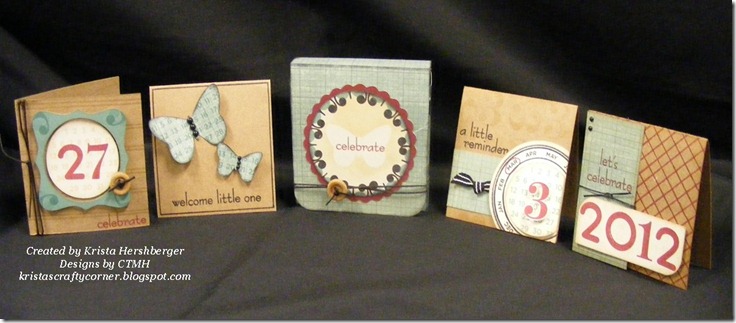
I chose to create a set of 3x3 cards AND a holder to place them in using the NEW January Stamp of the Month stamp set- "Little Reminder"! J 
 
In creating this project, I used the Art Philosophy Cricut Cartridge by Close To My Heart!! This cartridge has become a STAPLE in my craft room and I can’t quite image my room without this AMAZING cartridge!!!  I use it ALL the time!!

I had a LOT of fun trying to use this January stamp set in the “out of the box” way of thinking.  I often challenge myself to do this – and was pleased with the results!!!

The “box” that I used to hold these 3x3 cards is actually the DOORHANGER box that I cut out using the Art Philosophy Cartridge!! (font layer button, top row, shift key +5 buttons in from Left) I created some score lines on this door hanger and made a closure to create this box.

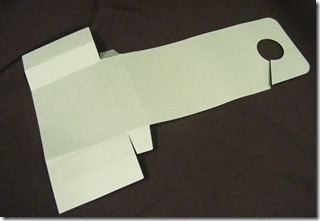
Here is a picture of the door hanger shape cut from the AP Cricut cartridge prior to new score lines.  Jan SOTM flat doorhanger
I also had a lot of FUN using the numbers in this stamp set in multiple ways. Can you see where and how I used the number stamps?  (I’ll have full details listed below)

The products I used to create this set are….
Z1375 Kraft Cardstock
X7139B Typeset level 2 paper pack
Z1686 Art Philosophy Cricut Cartridge
Z1387 Wooden Designer Buttons
Z282 Black Hemp
Z1335 Licorice Opaque gems
Z1368 Metal Bitty Brads
Z1393 Black Mini-medley
Ink colors: Vineyard Berry, Juniper, Crème Brulee, Desert Sand and Black
Feel free to scroll on down if you’d like to see more PHOTOS and details about the items I created.  If you’d like to continue blog hopping J, please "Hop" on over to Karen Fullam's Blog to see her GREAT work!
Be sure to visit all the Consultants at their Blogs to get some great crafting ideas and other fun ideas! Remember, the January SOTM is only available until January 31st! Don’t miss out on this AMAZING deal!!! 

How can you get this stamp set for your own?  You can purchase this EXCLUSIVE stamp set for $17.95 OR when you purchase $50 in Close To My Heart products – you qualify to receive this stamp set for ONLY $5.00!!!

Contact your CTMH Consultant (or click here to go to my site) to see how you can get this stamp set at a discount or even free!

 *************************************
I will show you a close up of the box first…

This is what the door hanger looks like when it’s cut from the Cricut and then taping the sides together.  Jan SOTM doorhangerI folded the hanger part over the bottom box and created scored lines where the box part begins to make the lid for this newly created box. 
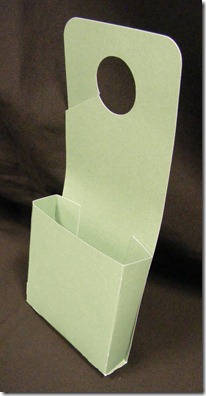
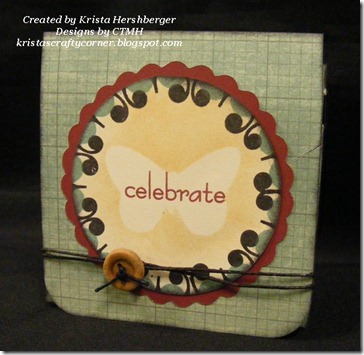
Jan 2012 SOTM door hanger boxI  then created a front for my “box”.  I cut out a scalloped circle (2nd row down from top, 1st shape on left) at 2.8” in the vineyard berry cardstock.  The colonial white circle was cut at 2 1/2” .  I used the #3 stamp for the black design AND the juniper design around the edge of the circle!  I was excited how this turned into a DESIGN!!! 

I cut out a butterfly with the AP Cartridge and used removable tape to tape it to the middle of the circle.  Then I sponged crème brulee ink around the butterfly, and removed the image to get the negative effect. I used Vineyard Berry ink to stamp “celebrate” and tied black hemp around the flap and added a wooden button as an accent to complete the outside.

Jan 2012 SOTM door hanger box_openInside I attached a velcro dot for the closure and then tucked the cards inside. 


Here are each of the cards I created…
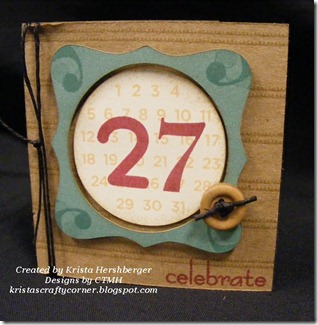
Jan 2012 sotm 3x3 card_27
This was the first card I created and I had fun using the stamps in different ways. 
Jan 2012 SOTM doorhanger box_card lines detailJPG

I LOVE to use my VersaMat by CTMH, when creating stripes or any borders on a project.  Here’s a picture of how GREAT the grid marks on this VersaMat work when doing this!!!  Do you notice how I stamped the lines, every other grid mark?  So helpful!!!
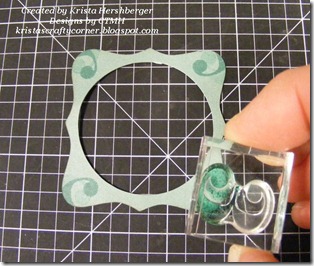


Jan 2012 SOTM doorhanger box frame detailI also wanted a “flourish” look for the corner of this frame (cut from the AP cartridge)  I used the stamp number 3!!!  I thought a picture might help to visualize how this was done. J You only need to ink up part of the 3 (LOVE clear stamps) and ta-da!


Jan 2012 SOTM 3x3 card celebrate
 
The next card is a simple one.  I used the line stamp to create a grid background.  I also used the corner rounder to add a bit to the “2012”.
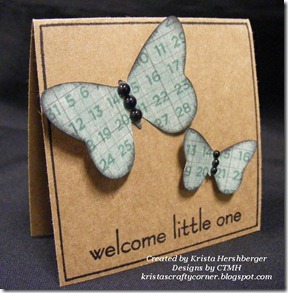


Jan 2012 SOTM doorhanger box_butterfly card
 
 
This card was a simple card as well!  I cut these butterflies from the AP Cricut cartridge and then stamped the numbers from this Jan SOTM stamp set onto the Typeset designer paper to add some more texture to the butterflies.  The solid line in this set made a great FRAME on this card, and the licorice opaque pearls added the final touch.
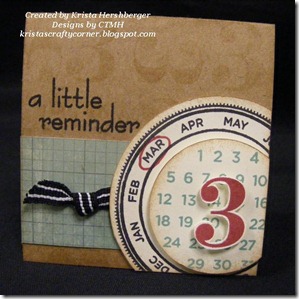


Jan 2012 SOTM 3x3 reminder
I enjoyed creating this card.  I wanted to have the circle off center on the card, and came up with this design.  I popped the middle circle (with the juniper numbers) off the page, and popped the #3 (cut out with cutting knife) too!  There is a lot of FUN dimension on this card!!!  Stamping the number 3 in desert sand (2nd generation) came as an afterthought…but I think I like it!

 
I hope you enjoyed the details J and didn’t get too bored!  I know I LOVE to know “exactly how it’s done” and I enjoy hearing how others create there projects too!!!

Make sure you check out the rest of the Consultant’s creations in this  Blog Hop as they use this AMAZING stamp set!!!  Please "Hop" on over to Karen Fullam's Blog to see what she has created with this January SOTM stamp set!!

Blessings to you for a WONDERFUL 2012!!
Krista

Friday, December 30, 2011

Love Card–Rock the Block

I had fun creating a CARD using the Rock the Block stamp set that I wanted to share with you!!! J

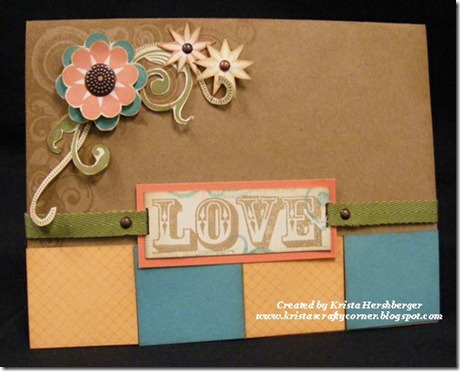
Here is the card…a 5x7 size and I used a pattern out of our ORIGINALS How-To-Book .  The pattern name is “Colors & Cubes and can be found on page 63. 
Rock the Block - love card
When I first saw the Rock the Block promotion – “CARDS” popped into my mind as I looked at the ADORABLE, Exclusive stamp set that comes with this promotion!!

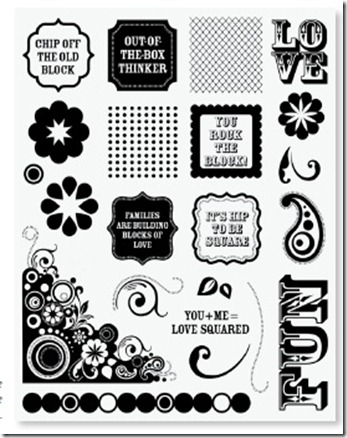
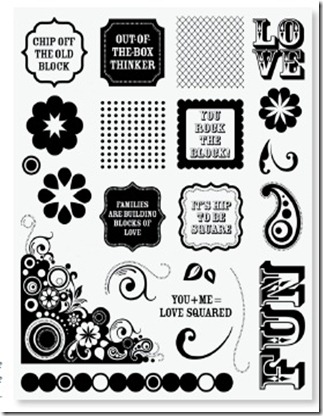
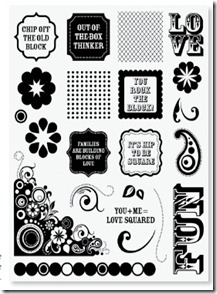
Rock the Block stamp set imageI knew I wanted to stamp “love” in one line, rather than in the block square.  I just inked up the “LO” first…stamped.  Then inked up “VE” and stamped along side of the “LO”.  I LOVE our clear, see through, acrylic stamps!!! 

  I LOVE the background images in this stamp set too!!  I used the screen print on the cardstock squares at the bottom of the card.  Of course the flowers, leaves and the HUGE flourish are all VERY useful too! I stamped a bunch of the flowers, cut them out and then had a FUN time deciding what colors I liked best to create the completed flowers. 

The products I used in creating this card…
I used Kraft Cardstock (this is becoming a FAVORITE!) for my card base.  Then I used the colors, Crème Brulee, Sunset, Olive, Desert Sand & Lagoon. 


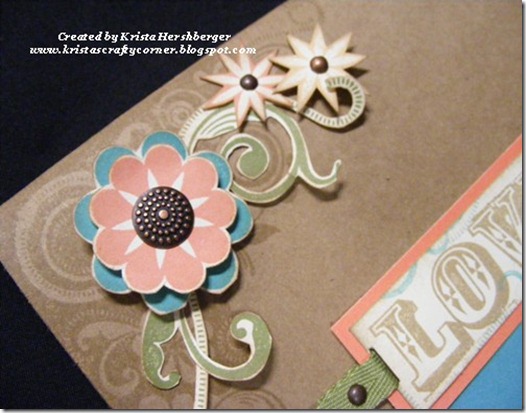
Yes, I did hand-cut the flourishes…I LOVE our cutting knife and Versa Mat to accomplish this task!!!  This is fun to do every once in a while.
 
For embellishments I used our Antique Copper Designer Brads and the metal assortment of brads.  I also used the Olive Mini-Medley ribbon.  I LOVE these Mini-Medleys!! They are only $4.95 AND they include such a nice variety of embellishments!!!  CLICK HERE to see the wonderful selection of Mini-Medleys that Close To My Heart carries!!!

Here is a close-up so you can see a bit more of the details on this card…
Rock the Block love card clsoe up
As you look at this stamp set…what does YOUR mind create? J

This Rock the Block promotion lasts until JANUARY 31st, so make sure that you get your qualifying order together and get one of these FABULOUS sets for your own!!!

The details…
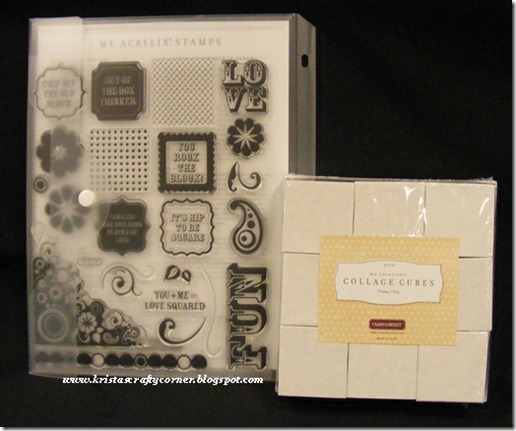
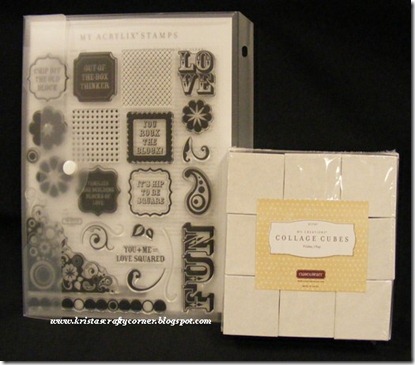
Here is a picture of what you will receive when you get the “Rock the Block” promotion. 
Rock the Block items
WHEN YOU PLACE A MINIMUM ORDER OF $25 FROM THE Autumn/Winter 2011 Idea Book, you can get these two new products for just $15: the My Creations® Collage Cubes (a Spring/Summer 2012 sneak-peek product!) and the exclusive My Acrylix® Rock the Block E-size stamp set. That’s a retail savings of almost $30!
You're going to love the Collage Cubes and the Rock the Block stamp set, which work together for interactive, 3-D fun.  This stamp set is only available UNTIL January 31st…so get your set today!!!


To see a video demonstration using the Rock the Block set, please CLICK HERE…

If you do not have a Close To My Heart consultant and would like to order your set today – please feel free to click on the shopping cart below. J
Happy Crafting and have a Blessed New Year!!!
Krista
Tuesday, December 27, 2011

Rock the Block with Close to my Heart!

I hope you all had a enjoyable Christmas!!! We had some great family time together…hence no blog posts! J I’m so thankful for EACH one of you and want to say THANKS for checking in on my Blog!!  I enjoy creating and sharing with you!!!

Today, I wanted to share with you about TWO great specials Close To My Heart has that are taking place RIGHT NOW!!!  Check it OUT!!!

FIRST – the amazing “Rock the Block” special!!!
Check out this GREAT video by CTMH showing you the Rock the Block special and then read the details below! J


Here is a picture of WHAT you will receive with this wonderful deal!
Rock the Block items
A E-size EXCLUSIVE stamp set (retail $29.95)  AND the ADORABLE set of “My Creations Collage Cubes” (retail $14.95). 

This is an AMAZING deal and it’s so EASY to receive this special!!!

Details, details….J
Purchase $25 in Close To My Heart product and you will qualify to get these TWO items (shown above)
for ONLY $15!!!! 

Yes, this set has a retail value of $44.90…but when you order items from our current idea book – you only pay $15!!!! 

 CLICK HERE to place your order to receive your OWN “Rock the Block” special!!

If you’d like to see how I used this Rock the Block stamp set and blocks, CLICK HERE to check out what I created using our Sonoma paper.  Rock the Block family
SECOND– December Stamp of the Month – “Mad About You” !!!
Don’t FORGET this GREAT deal when your subtotal sales
reach the $50 mark!!! 

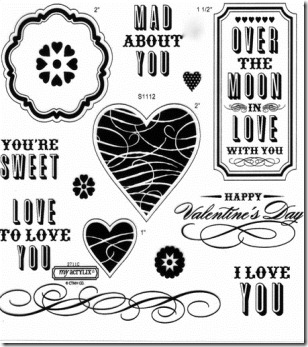
Check out this Cricut compatible stamp set…
12-11 SOM ImageThis is a stamp set that is ONLY available during the month of December – ONLY 4 more days!!!

Details…DETAILS!!! J
You can purchase this set for the retail price of $17.95 OR
save 77%  when you purchase $50 of QUALITY, EXCLUSIVE products from Close To My Heart,
you qualify to receive this stamp set for $5.00!!!!

CLICK HERE to see how I chose to use this stamp set…of course, there is soooo much you can do with this set!!! I LOVE the flourishes…and the different size hearts…and the adorable bracket…and the….

Blessings to you for a wonderful day!  Stay tuned for my post about my “Scrap Basket”…until next time!!!

Happy Creating!
Krista
Wednesday, December 21, 2011

Quick and Simple Gift Card Holder

Do you need a QUICK but BEAUTIFUL gift card holder for that last minute gift? J

I found this EASY, but SIMPLE gift card holder created by fellow consultant Tina Sutton!!  Thanks so much Tina!  You can check out here Blog HERE…she has so many creative ideas, I often check out her Blog to see what she is creating when I need inspiration! J

To create this gift card holder, you will need a 3 1/2 x 10 inch piece of paper, a double-sided pattern paper makes this the easiest.  Then you will need a 3x3 square and a 1 1/4 x 3 1/2 piece of cardstock, a stamp set of your choice and embellishments for your finishing touch! 

Here is the picture of the finished product… (the inside picture is below J)
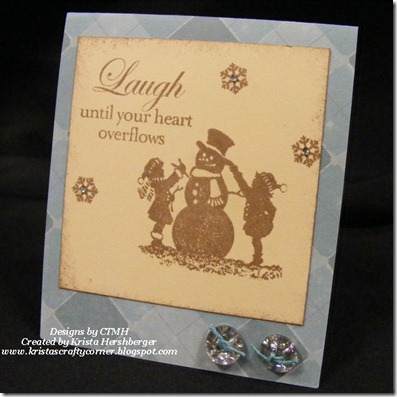
winter joy wonderland gift card holder

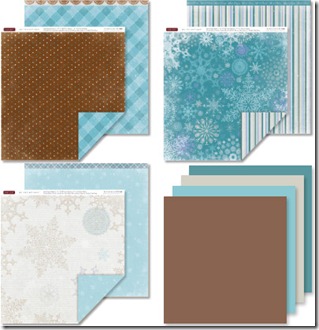
I used our Wonderland Paper packI LOVE using designer paper, especially since it is now cardstock thickness! Our paper has two BEAUTIFUL designs on one sheet of paper – one on each side – and it is a PERFECT fit for this quick easy creation!
Wonderland Paper Pack x7146b

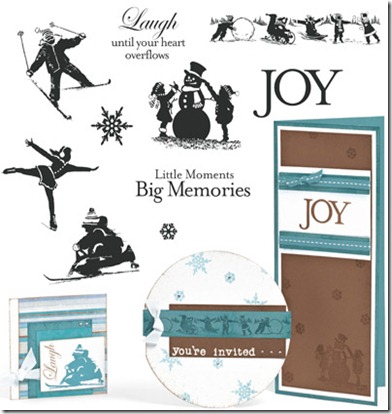
I also used a new stamp set  from our Fall/Winter Idea Book called Winter Joy.  This is becoming a FAVORITE of mine!! I just used the snowman stamp to add a bit to the outside of my envelopes this holiday season. J
Winter Joy c1468

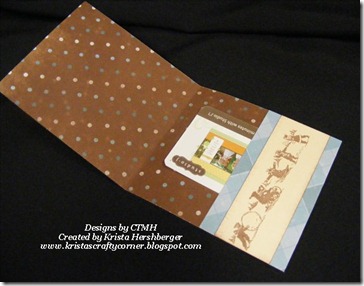
To create this gift card pocket, score the 10” long paper on the short sides at 4” and 8”.  Fold up the 2” piece to create the pocket.  Then fold down the 4” piece to create the front.   You can stamp your images on the pieces of cardstock prior to gluing them down.  I used Chocolate ink for the stamped images as well as the sponged edges on the pieces. 

Here is a picture of the inside.  All you need to do to create the pocket, is glue the two sides of the 2” piece of paper and let the middle unglued so the gift card will fit inside. 
winter joy gift card inside

For the final touch – I used our bitty sparkles AND some buttons from our Bling Assortment threaded with Crystal Blue Waxy Flax. J bitty Sparkles Z1263
Bling Assortment z1466

Crystal Blue Waxy z1247
Have fun as you create your gift card holders!!! 

Happy Creating!!!
 Krista
Click on the shopping cart below to place your online order.


Sunday, December 18, 2011

Rock the BLOCK Blog Hop!

Welcome to our Rock the Block Blog Hop!

We will be featuring December and January’s Constant Campaign!!!  This special starts TODAY – December 19th and it includes an E-size stamp set AND a PREVIEW of a new item in our Spring Idea Book – My Creations Collage Cubes!!!! The stamp set includes 22 ADORABLE stamps!! 

This EXCLUSIVE stamp set & collage cubes can be YOURS when you purchase $25 in product from the current Fall/Winter Idea Book. The RETAIL VALUE of these two items are $44.90 – but you will pay just $15.00!!!  Yes- you will be getting the E-size (retail value $29.95) for FREE!!!!
Rock the Block stamp set image
Rock the Block items

If you have come here from Gina’s Blog, you are on the right path! The blog hop is a great big circle, so you can start here and work your way all around. If you get lost along the way, you’ll find the complete list of participating consultants HERE.

Today we have over 30 Close To My Heart Consultants sharing their creations using this Rock the Block special!! Yayy!!!  So sit back and enjoy each creation as you venture through this blog hop and get GREAT ideas to create on your own!!


This Hop is simple to do - just click on the link at the end of the post on each blog to move to the next one! Here we go!

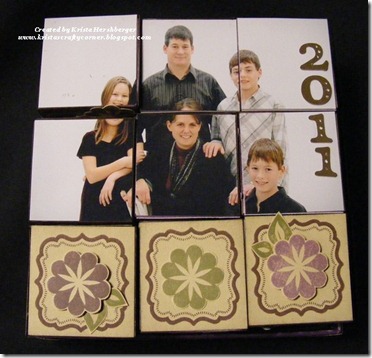
Rock the Block family
I had a LOT of fun using these Collage blocks.  I wanted to create a set of travel games, but time got away from me, so I chose to create an picture album puzzle using our current Christmas pictures. 

There are SIX sides to these collage cubes PLUS it comes with a tray to store the cubes in too!!!  There were a LOT of items to decorate….and the ideas kept coming as I was creating! J I tried to do a different technique on each side of the cube so that you can see a VARIETY of ways to use your stamps and inks!

It was VERY hard for me to not embellish these blocks J– as you notice, I did use 3D foam tape (which I would NOT recommend using J) and some of my blocks are a bit tight in the tray and do not flip very easily. 

 Products I used to create these collage cubes puzzle…
Z1686 Cricut Art Philosophy Collection
X7143B Sonoma level 2 paper
Z1635 Heirloom Assortment
Ink colors I used…
Smokey Plum, Petal, Olive, Bamboo and Cocoa
Now "Hop" on over to Jen’s Blog to see her amazing artwork!
Be sure to visit all the Consultants at their Blogs to get some great crafting ideas and other fun ideas!


If you would like to see more details (and pictures) of the rest of my projects, please feel free to scroll down for the details! J

Remember, the Rock the Block special is only available until January 31st!!! Place your qualifying order of $25 in CTMH product and receive these TWO items (retailed at $44.90) for ONLY $15.00!!!! Contact your CTMH Consultant (or click here) to see how you can get this stamp set at this amazing discount!
********


Here are the rest of the details for the collage blocks I created...

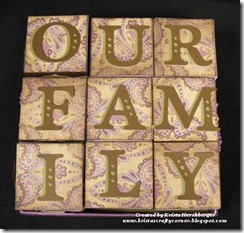
Rock the Block - our familyI wanted to use some of the BEAUTIFUL Sonoma paper…and decided to use the Art Philosophy Cricut Cartridge to create some letters…nothing fancy, but nice and simple.


We had gotten our pictures taken the other week and I thought this was the PERFECT opportunity to use them!

Take notice of how a 4x6 picture will fit on these cubes PERFECTLY!!!!  That is a 4x6 picture cut into 2” squares.

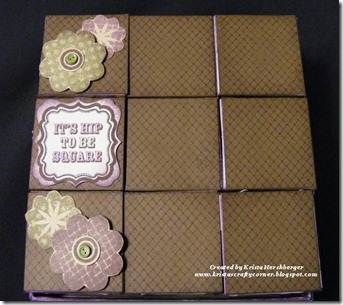
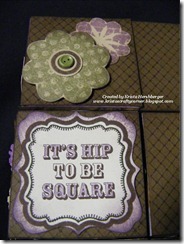
Do you see the frames stamped at the bottom?  If you look at the stamp set, you’ll see there is NOT just a frame shown as a stamp.  What I did was masking…I stamped the framed image “it’s hip to be square”  and cut out the middle of the frame.  When I wanted to stamp just the frame, I put the cut out words over my inked words on the stamp,  and by doing that, I only stamped the frame image that I wanted!   
Rock the Block stamp set image

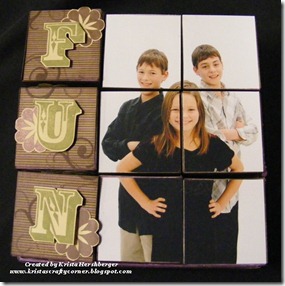
Rock the Block- FUN
This next side was a picture of just our three precious children. 

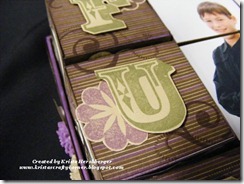
I took the stamp “FUN” and stamped it on bamboo cardstock, and then cut out the letters separately.  If you look closely, you will notice they are not cut perfect…that’s why I put a flower behind each letter so it would hide the imperfection. J It’s also fun to stamp flourishes on top of B&T paper.
Rock the Block - FUN close up
This is one side of my cube where I used the 3D foam tape…I would suggest not doing that as it makes your blocks larger and therefore they do not fit back into the tray like they should. J


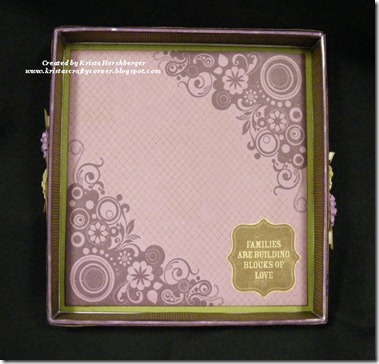
Rock the Block trayI chose to decorate the bottom tray that comes along with the Collage Cubes.  I did not have the pictures printed that I’d like to put on here, but thought you might like to see the stamped part of the project. J
I LOVE this HUGE flourish that comes in this Rock the Block stamp set!!!  So many things you can do with this stamp!!! 

Take notice that I used one of the background stamps in this set to add a bit of texture between the two stamped images.  I think I may use my cutting knife to cut away some of the flourish design, and then tuck my picture behind the flourishes…


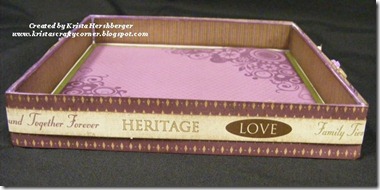
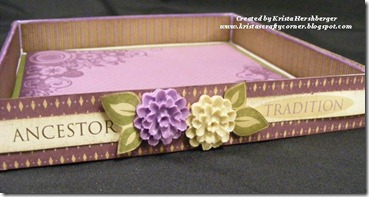
Here is the outside of the tray…I used our Sonoma paper pack and THRock the Block - tray zip stripEN I used our handy-dandy “zip strips” as my border! (these quick "zip strips" come in EACH of our NEW paper packs as a little extra!)  The zip strips are 12” long…but this tray measured 6 1/2” x 6 1/2”.  Uh oh- what to do?!? The zip strip will not be long enought!!!!  Well…this is where I can use EMELLLISHMENTS!!! J I pulled out my coordinating Heirloom Assortment and used those ADORABLE flowers to cover up the ends of my zip strips!  So clever! J

Rock the Block - tray heirloom flowersThen I used the leaves stamp from the Rock the Block pack to make the flower look more real!!! J


I did not have pictures to finish my collage blocks BUT I did complete all 6 sides!!!


Check out how each one is created a bit differently! J

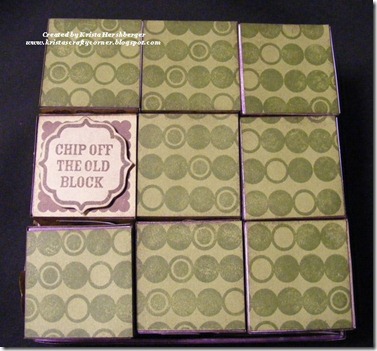
Rock the Block- circle border backgroundI used the circle border stamp to create a background!!!Rock teh Block close up Chip off...
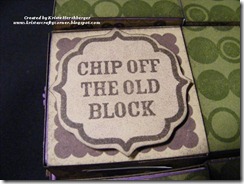
Take a look at the “chip off the old block” image.  Can you see I stamped TWO different frames and then just layered them on top of each other? J  I wanted a different look and decided to try this!


Rock teh Block - cocoa backgroundThis side of the blocks will be for a picture of our daughter.  I stamped the entire 6x6 cocoa cardstock with the one of the texture stamps.  Then I created some flowers by using the “Stamp kissing” method to create a design in my flower!!!  This gives my flowers texture and a different appearance from the original stamp! 

I also cut a shape on the Art PhilosophRock the Block - hip to be square close up JPGy cartridge for the “It’s Hip to be Square” stamp.  It did not line up perfectly with the precut shape, so I colored the edges that it didn’t line up in smokey plum! 
Also, I used my CTMH markers on this side.  I colored in a few words  on this stamped image and I colored the dotted line around the inside of the bracket line with the olive colored marker too!


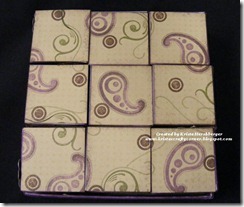
Rock the Block - paisley stamped background
My final side of the collage blocks are a random stamped side.  I will be putting one of our sons pictures on this side…so I didn’t want too girly, but decided to pull out that paisley stamp and do some 2 color stamping.  I first inked my stamp in the lighter color – petal, then I rolled the outer edges of the stamp in a darker color – in this case smokey plum.  I then get a two toned stamped image!!!

Now "Hop" on over to Jen’s Blog to see her amazing artwork!

I hope you enjoyed these details! J  Feel free to leave a comment!  I enjoy reading each one of them! 

Have a very Merry Christmas!!!
Blessings!
 Krista


Wednesday, December 14, 2011

Wonderland Delight with Studio J

This monthly Love Your Layout video has some WONDERFUL tips for when you use Studio J!!! You won't want to miss this episode!


If you are interested in learning more about Studio J, please CLICK HERE to go to an earlier post that will share details about how YOU can “Play for FREE” with Studio J . I LOVE that you can PLAY before Purchasing!! Yayyy Close To My Heart!

OR if you already know the details about how Studio J works AND you would like to CREATE with Sudio J -just head over to my website by clicking here!!!

Happy Creating! J
Krista
Saturday, December 10, 2011

Art Philosophy Blog Hop

A HUGE thanks to Lisa Stenz for hosting this Art Philosophy Blog Hop!!! 
I am AMAZED at how I use this Close To My Heart Cricut Cartridge for almost EVERY project I create!  (and I was NOT a Cricut user prior to CTMH releasing this cartridge! J) I  may just cut a simple circle for some, but more often than not – I use this cartridge to cut many of the wonderful shapes, designs, 3D items, etc. from this MAGNIFICENT cartridge!!!
Cricut-Beauty_text
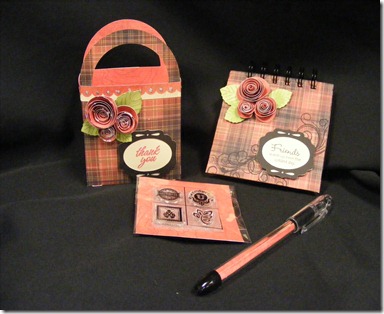
Today I’d like to share with you a hostess gift that I have given recently using the Roxie paper pack.  My cousin recently had a book party for me (thanks Jodi J) and I wanted to show my appreciation to her by giving her these gifts!
DSCF9136
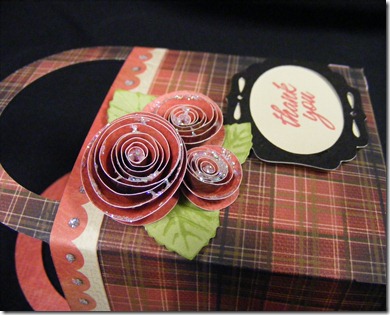
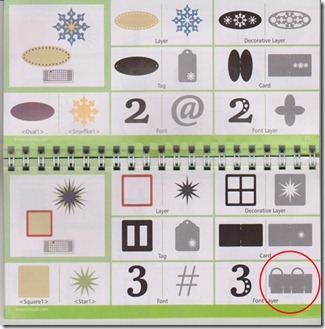
I created the purse from the Art Philosophy Cartridge.  The purse is found on page 23 of the booklet.  On the keypad, you will hit the “Font Layer” button + the “Shift” button and then the top row…3rd button in from the left.  If you would like to make the largest size purse you can - you will need to press the “fit to page” button and it will cut ONE purse at 6 1/4”.  (I’m wondering if I had a Gypsy – if this could be changed???)  To create TWO purses on 1- 12x12 sheet, you will set your Cricut size to 5 1/2” and you will get TWO purses!! 
pg. 22-23 Cricut mini purse circled
For the flowers…I used the “simple” roses, with no waves or wiggly edges.  I hadn’t used this flower much, but decided to give it a try! 

Well, let me tell you – I’ve been creating a LOT of these flowers lately! J You will find this flower shape on page 70 of the Art Philosophy Cricut booklet.  I cut the roses at varying sizes…3 1/2”, 2 1/2” and 1 1/2” are three sizes you could use. 

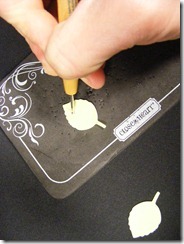
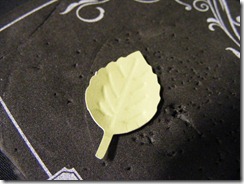
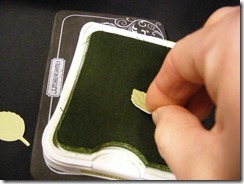
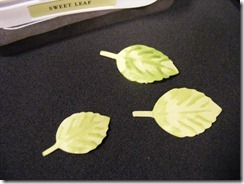
I used the leaf key (2nd row from bottom, 6 button in from left, shift key) for the foliage.  After the leaf was cut, I took my dry embossing stylus and created “veins” in the leaf.  Then, swiped the leaf in sweet leaf ink and ta-dah…a real life looking leaf! J
DSCF9234 DSCF9237
DSCF9239   DSCF9240
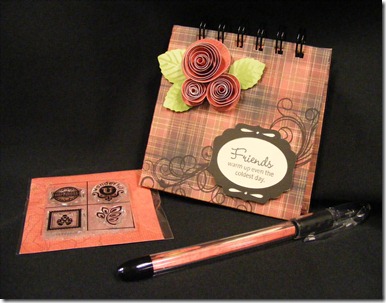
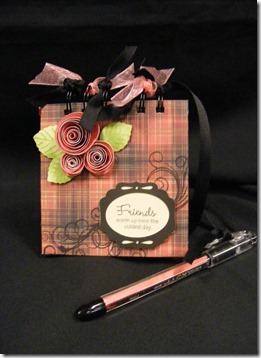
Here is a post it note holder that is shown in the picture above…
DSCF9137
I enjoy creating these post it note holders…they are so FUN to do!!!
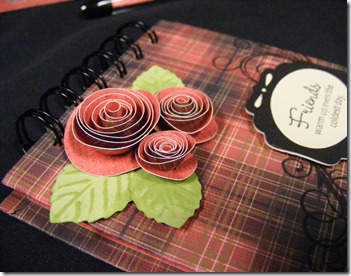
I used 2 pieces of 4” cardstock squares and covered them with Roxie paper.  The plaid squares are cut at 5 1/2" and then folded over the edge of the cardstock.  I then cover the insides of the post it note with the other side of the plaid paper– the smoothie, rose print. These are cut at 3 3/4" squares, just to cover up my folded edges of the plaid.  I then used my Bind-it-All machine and punched holes and put in the spiral binding. 

I cut some more roses using the Art Philosophy Cartridge AND cut the bracket shape too! 

The bracket is found on page 37 of the Cricut booklet.  For the vanilla cream bracket that I stamped on – use the Tag key, and press the 2nd row, 4 keys in from the RIGHT.  For the black frame of the bracket…use the Layer key and the 2nd row, 4 keys from the Right button. 
DSCF9138
I used two Stamp sets to create this.  The saying “Friends…” came from the Bundled Buddies stamp set.  I LOVE swirls and flourishes J and in this case I used the Instant Memories stamp set to add these swirls. 
DSCF9143
  For the finishing touch, I tied some ribbon to the spiral binding and I also created a pen to match this post it note holder. 
Look at what a little bit of Stardust Glitz Glitter Gel does to any creation!!  I LOVE the effect of our Glitz Glitter Gels!!! Check out ALL of our four colors by clicking here!!
DSCF9141
I hope you were inspired and are ready to create with your OWN Art Philosophy Cricut Cartridge!!! 

If you are not familiar with the NEW Close To My Heart Cricut Cartridge...know that this cartridge HAS it all!!! J 

There are LIMITLESS opportunities with this cartridge !!! You can create over 700 images with this ONE Art Philosophy cartridge!!!  You have a font (and a font layer), 3D flowers, 3D boxes, envelopes, card shapes, etc... ALL on THIS cartridge!!!  PLUS - what I LOVE the most, so many of these Cricut images coordinate with our wonderful My Acrylix Stamp sets!!! YES - no more cutting out stamped images...instead, cut the image with the Art Philosophy cartridge, and stamp your design directly on top of it!!  Wa-Laaa! Faster. Simpler. Easier!!!! This IS a Cartridge that you will use OVER and OVER again!! 

Contact your CTMH consultant if you would like to purchase this cartridge today (Christmas is right around the corner J) OR if you are not associated with a consultant, please feel free to contact me and I will be happy to answer any questions you may have concerning Close To My Heart!!

If you'd like to join this HOP - please DO!!!  The only guideline for this Blog Hop/Linky Party is that you use the Art Philosophy cartridge somewhere on your project. You can use any brand of paper, embellishments, stamps, etc, but make sure you tell us how you used the AP cartridge. The hop will be open for a week and will close to new entries on Monday, December 12th.  More details are found on Lisa Stenz's blog by clicking HERE

Blessings to you for a BEAUTIFUL day!!
  Krista