Welcome to our monthly
Joyful Stars Blog Hop!!!!
Joyful Stars Blog Hop!!!!

We're excited to share our creativity with you using PRODUCTS from Close To My Heart!!
Come on in and see what BEAUTIFUL projects my fellow consultants have creating using the AMAZING products from Close To My Heart!!
If you get lost along the way, CLICK HERE to see the list of this month’s hoppers!
~~~~~~~~~~~~~~~~~~~~~~~~~~~~~~~~~~~~~~~~~~
I know it seems EARLY - but Christmas IS right around the corner!! So...today, I thought I would share a Christmas Card that was created in 10 minutes - Cricut cutting included!
I used our NEW Artfully Sent Cricut cartridge! J

I found this card on Key "Env 10" - the SENTIMENT function key - page 48.

I set my dial at 7” to create a 5x7 card and cut TWO cards out of the white daisy cardstock.
I used the one card as it was…but the 2nd white daisy cardstock card, I cut off the back of the card…and cut out the angel & peace inside to create a rectangle frame.
Next, I ran the rectangle frame through my Cuttlebug machine using the “Quatrefoil” 5x7 embossing folder. Then I glued that embossed card front directly on top on the other one...ta-da!! An embossed "frame" for the front of this card!

Any guesses on what I used to color in the word “Peace”?
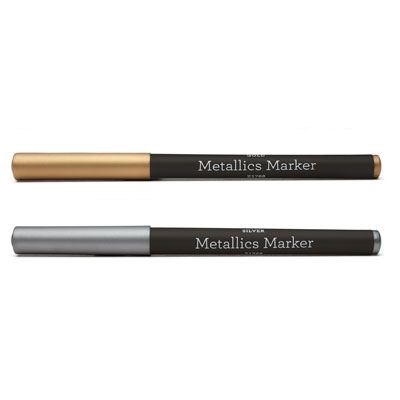
I LOVE these metallic markers - they come in a TWO Pack for ONLY $4.95!!
I have used both the silver & gold metallic markers, again & again since I’ve created this card!! I can hardly believe I haven’t used these beautiful markers before!!
I have used both the silver & gold metallic markers, again & again since I’ve created this card!! I can hardly believe I haven’t used these beautiful markers before!!
Next, I need to add some SHIMMER & SHINE to this card...so I used a piece of our GREEN Glitter paper to put behind the angel.
I wanted to cover up the backside of the glitter paper, so that means I need an inside pretty piece of paper…and started looking through the Artfully Sent booklet.
I FOUND it - exactly what I was looking for !! A scallop edged cardbase!!

Instead of cutting this Sweet Leaf cardstock at the suggested 7” size, I downsized it to 6 3/4” so that part of the white base card would show through. Take a look at how the inside of this card turned out.
Instead of cutting this Sweet Leaf cardstock at the suggested 7” size, I downsized it to 6 3/4” so that part of the white base card would show through. Take a look at how the inside of this card turned out.

By using the inside pieces (or negative pieces that I was going to throw away) from this card below…

I was able to continue the Christmas theme inside the angel card by adding a shepherd, lamb & star. 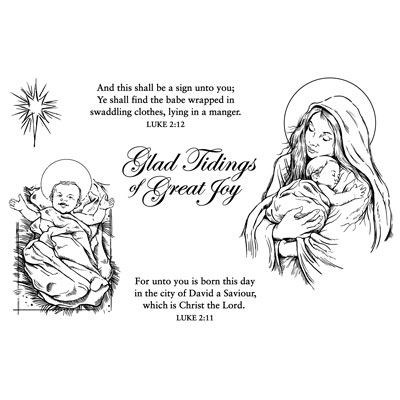
I stamped a Christmas Bible verse. This came from the “Mary & Babe” stamp set and completed this very EASY, but beautiful Christmas Card!! J
~~~~~~~~~~~~~~~~~~~~~~~~~~~~~~~~~~~
Now it’s time to Hop on over to my friend Stephanie Huber’s blog to check out what beautiful, crafty item she has to share with us! J
Happy Hopping and we’ll see you on the 9th next month, when the Joyful Stars team members will be sharing more artwork using Close To My Heart products!
Blessings to you for BEAUTIFUL day!!!
Krista Hershberger J
TFS Krista, I love all the ways you showed to use Artfully Sent. Your cards are fabulous!
ReplyDeleteI love how using our Cricut cartridges leave us so many "extra" pieces that just. must. be. used. Your cards are beautiful!
ReplyDeleteYour card is beautiful. I have not tried making the Angel card yet - thanks for the inspiration.
ReplyDeleteBeautiful Christmas card and so quick to make! Wow!
ReplyDeleteI love this card! The glitter paper behind the image is beautiful, but I really love the inside of your card too. Your explanation of all that you did, and how you used extra pieces is great too. Thanks for sharing!
ReplyDeleteWhat a fabulous Christmas Card. Thanks for the great explanation of how you made it.
ReplyDeleteI actually used my metallic markers for the first time too. They are perfect for Christmas.