Showing posts with label 2 page autumn layout. Show all posts

Thursday, November 28, 2013

Happy Thanksgiving - Fall/Babycakes 2 page layout

Happy Thanksgiving to each of you!! 
Blessings to each of you as we think & give thanks for the many things we have been blessed with!

Today, I wanted to share another Autumn project with you…it’s not too late…right?  It’s still Thanksgiving - LOL!! 

I realized that Autumn is almost over and I haven’t shared one of my FAVORITE fall layouts with you!!  I’m excited to share this with you today! J


I really love the Babycakes paper pack that CTMH debuted this Autumn/Winter season! 

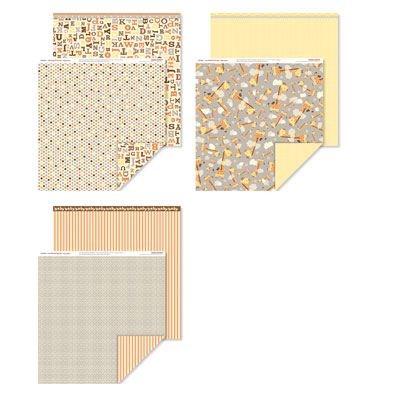
The neutral colors are what I work with best, and even though I don’t have babies in my home anymore…I knew I would most likely use this paper pack often because of the neutral tones.

Well, I was right AND I’ve been quite happy with the many items I’ve create with this pack!!


Take a look at this 2 page layout!! This layout design came from our MAGIC how-to book, on page 40, called “Levitate”.
Babycakes_2 page_east brandywine_layoutDSC_0510
I created this 2 page sample for my East Brandywine Crop that is held at the end of October each year!  We always have a make and take that you create for FREE J - and I usually create some type of border for make n take that can be used on their scrapbook pages. 


Here is the border everyone created for the make n take….
Babycakes_makentake_east brandywine_artbooking_alcohol markers_washi_irresistibles DSC_0521
The shiny, sheen you see in the middle of this border is pearl paint!  I LOVE the option CTMH’s pearl paint can bring to any creation!!  It added a little extra touch, by painting the pearl paint overtop of the paper.
And of course, I LOVE to share  a 2 page layout of a POSSIBLE way that this make n take border be used! 

Let’s take note of some of the FUN items on this page…
Babycakes_2 pg. layout_east brandywine_alcohol markers_artbooking DSC_0510
The WASHI Tape…yes, I have it bad…I love to use washi as a “quick embellishment” quite often - and I LOVE how it looks!!  This repositionable, decorative tape adds so much to ANY creation!!!  If you haven’t tried it yet, you must give it a try!!! 

Did you NOTICE how the washi tape will “take on” the background color?  So, I used the woodgrain washi (from the Party Washi Tape pack) on 3 different background colors - Sunset, colonial white & dotted designer paper!!  I LOVE how it looks different on EACH of these backgrounds!!

Washi tapes by CTMH_8 different kinds DSC_0705

Close To My Heart now carries 8 different washi’s

2 individual washi tapes (the middle ones)…

AND 2 different types of 3 pack Washi tape’s - that are ONLY AVAILABLE until Dec 31st OR while supplies last!!!

Washi Tape_sparkle and shine_3 pack_fall 2013DSC_0709         washi tape_party pack 2013 DSC_0711
I LOVE the 1” thick tapes, and will miss this size in the next Idea book…however, I know that there will be more washi coming our way in Feb 2014!! 

Here’s a close up of some MORE washi!!

DID YOU KNOW…you can use washi to actually adhere the photo mat to the paper…J
Babycakes_2 pg. layout_east brandywine_alcohol markers_artbooking_close up fall frame DSC_0510
OR use washi tape to create a “patterned arrow” by placing washi tape behind the image!! 

One MORE use of washi...did you notice the yellow pennants???  Yup, this is washi tape too! 

A few more things to note….
  • The orange (sunset) photo mat and leaves were cut by our Artbooking Cricut cartridge.
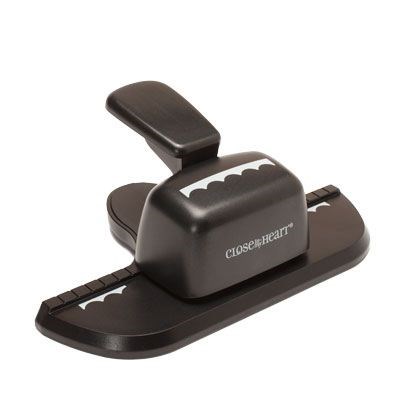
  • The glitter scallop on the right side, was scalloped with our NEW Scallop Border punch!!
  • The arrows stamped on the yellow (buttercup) piece came from a favorite NEW stamp set- One Way Borders.
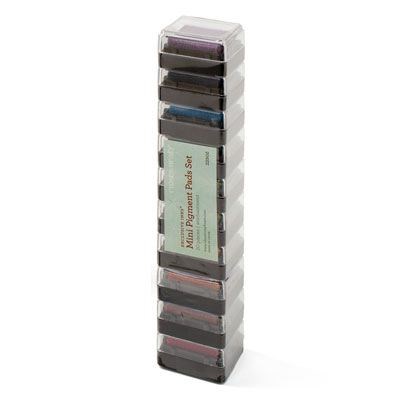
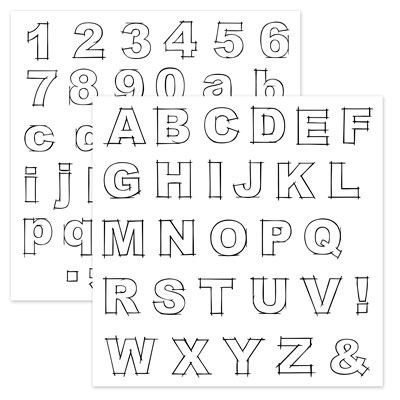
  • I used PIGMENT inks to stamp the word fall (LOVE this framework alphabet stamp set!!!!)
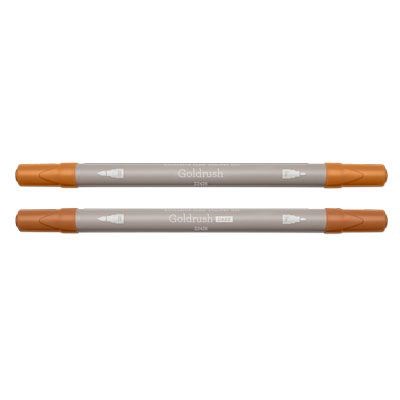
  • After letting the pigment ink dry for a bit, I then colored in the word “fall” with our BEAUIFUL alcohol markers


Another item I used in this 2 page  layout…

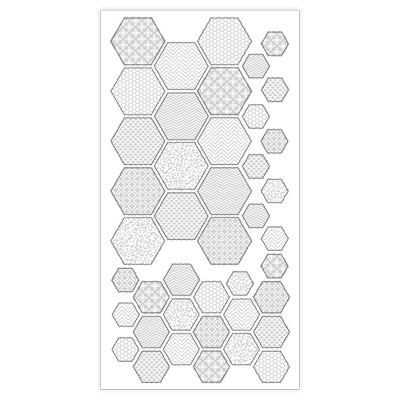
Our Irresistible Shapes - I used our Honeycomb ones shown here…


The shapes come PRE-embossed and look “white” with a design on it when you purchase them…
Babycakes_2 pg. layout_east brandywine_alcohol markers_artbooking_close up 2013side  DSC_0510
however, when you “ink up” the shape (sponge daubers work best) with whatever color coordinates with your creation you will be AMAZED at how EASY it is to add an accent to your creation!!! (notice the pennant washi tape running down the right side…wahoo LOVE Washi!)


As you can see, the Babycakes paper pack is the PERFECT pack to create a fall layout!!!  I encourage you to take a moment to look at CTMH’s other paper packs and look at the colors to see how they can be used DIFFERENTLY from their "normal" theme!!

 
2013 buzz and bumble card _ExclusiveProductIf you’d like to collect these items to create a layout that is similar…feel free to head to my website by CLICKING HERE.


There are MANY specials still taking place the last few days of November!!!  Just click on the word SPECIALS above, to view these WONDERFUL deals!!!


ALSO - NEW…make sure to check out the RETIRING LIST on my website!!!  The items on this list are WHILE SUPPLIES LAST & will not be available AFTER Jan 31, 2014. 


Blessings to you for a BEAUTIFUL day!!

Krista J

Friday, November 16, 2012

Autumn Title Topper–with NEW products :)

Recently I was asked to create something for a Make N Take at a local crop.  What FUN!!!

The requirements were that it needed to be something that could be completed in 15 minutes…but would be something they could add to their scrapbook page. 


So… I thought I’d create a TITLE TOPPER for any of their fall scrapbook pages.  I was pleased with how this came out…and I was able to experiment with NEW products! J
downingtown crop make n take title topper_wooden shapes-pigment inks
There were a BUNCH of new items that came out in our last Idea Book that I still hadn’t played with – so NOW was my chance!!!


NEW ITEMS I used…
Pigment Inkspigment inks - basicZ2503

Color-Ready Arbor Wooden Shapeswooden shapes_arbor Z1765

and Burlap Ribbon Burlap Z1760

The burlap ribbon I had already used quite often, and it’s become one of my favorites because there are SO many ways to use it!!

BUT – I hadn’t played with the pigment inks OR the wooden shapes. 
I was DELIGHTFULLY surprised with my results!!!

Check out what I learned!!!

 I inked up the leaves in different colors of the pigment inks as I was playing…and took a picture! J

Notice – the TOP ROW of shapes, 4 out of the 5 used the Harvest Happiness stamp set!!!  The MIDDLE shape, I tried our alcohol markers to color that in.

The BOTTOM ROW, I tried different techniques – and wrote my notes about what I did. J
wooden autumn shapes and pigment inks
I LOVED the pigments inks…they were WONDERFUL!!!  Such vibrant, beautiful colors…and it was so EASY and QUICK to quickly add ink to these wood shapes!!

 I also realized we had not ONE but TWO STAMP sets that COORDINATED with the Wooden Shapes!!!

Stamp sets used that coordinated…


If you look at the picture above of all my leaves once again…you will notice, SOME of the leaves were stamped with the images in the Harvest Happiness stamp set!  The sizes of the wooden leaves and stamped images MATCHED perfectly!  How QUICK & EASY!!!


Here is a page that I created using my title topper!! 
downingtown crop make n take layout_wooden shapes-pigment inks
I used our Make It From Your Heart how-to book- pattern # 5!! (LOVE this how-to book!!) Make it From your Heart book _HowTo_Cover

Some close up views…
Give Thanks layout_close up acorn leaf cluster

The green leaf was cut with cardstock on the Cricut machine (then stamped with Harvest Happiness stamp set), but the other leaf and acorn are from our arbor wood shapes collection and I just swiped on the pigment ink - QUICK & EASY!!  

For the cap of the acorn, I used the Universal background stamp set (one of my FAVORITE stamps!)  to give it some texture. J  


Next check out this WONDERFUL wooden pumpkin!!!!
Give Thanks layout_close up pumpkin


I used the So Grateful stamp set, and 2 colors of pigment inks- goldrush and honey – to create this pumpkin!!!


I was SO excited that the design of my stamp set came through so perfectly!  For the pumpkin stem, I took my 1” pigment cube, and swiped the NE Ivy color on very carefully.


I hope this has inspired YOU to create something for this autumn season! 
I’d love to hear your comments on what you think of our NEW pigment inks, and our laser cut wooden shapes! 


If you are interested in getting the above stamp sets for your own– you’ll want to make SURE you take advantage of
 Close To My Heart’s November special!!! J
  

During November...

 *Purchase $50 in CTMH products...

*then purchase the November SOTM for ONLY 

$5 (retail value $17.95)


*get YOUR CHOICE of any stamp set for 1/2 

price!!!


Also, with every Stamp of the Month stamp set purchased this way,
 CTMH will give $1 to the American Red Cross to help those affected by Hurricane Sandy!  

CLICK HERE to go to my website and join the November Orders with Krista shopping link!!  


Happy Thursday!  


Krista J
610-587-9116
fun2stampnscrap@dejazzd.com 


*****Receive BONUS items from me personally,

( Dotty for You paper pack, It’s Your Day stamp set - retail $55.85)

 when you Join my Team in November!!  

CLICK HERE for details! J


November Stamp of the MOnth PLUS...

****Purchase $50 in CTMH 
product, 


Get the November


 SOTM for $5


and you are ELIGIBLE to 


receive a STAMP SET of you


choice for ½ price!!!


PLUS… for every November Stamp of the Month

 set purchased - $1 will be donated to the Red Cross 

for those effected by Hurricane Sandy! J